 微语:代码适合中午敲,早晚出BUG
nth-child的使用方法 前端
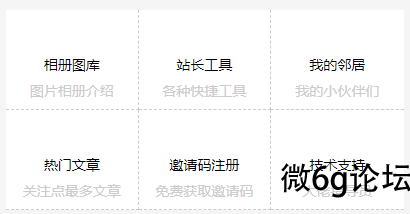
废话不说多少先上效果图
图一:
图二:
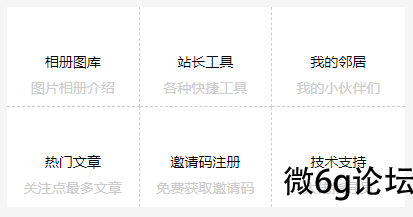
仔细观察就会发现图二第二行都没有了下边框,虽然解决办法有很多,比如给每个元素单独添加id选择器和类名选择器去逐一选择,但是这样会很麻烦,代码一多也容易造成代码冗余,这里推荐一种方法可以很快捷的实现上面功能。
.nav-fl li:nth-child(n+4){
               border-bottom: 0;
            }
选择了第四个元素和之后的元素。
更多使用方法如下:
first-child:选择第一个li标签设置字体大小为12px。
li:first-child{
    font-size:12px;
}
last-child:选择最后一个li标签设置字体大小为12px。
li:last-child{
    font-size:12px;
}
nth-child(n):选择第n个li标签设置字体大小为12px.
li:nth-child(3){
    font-size:12px;
}
nth-child(odd):选择为奇数li标签设置字体大小为12px,或者通过nth-child(n+1),nth-child(2n-1) 也可以选择奇数行
li:nth-child(odd){
    font-size:12px;
}
nth-child(even):选择的偶数行li设置字体大小为12px,或者通过另外的方法选择奇数行:nth-child(2n)
li:nth-child(even){
  font-size:12px;
}
不只是上面的固定写法,还有更灵活的组合方法,例如:
/* 选择前三个元素设置其背景颜色 */
li:nth-child(-n+3){
    background: #5555ff;
}
/* 选择第二个元素以及之后的元素 */
    li:nth-child(n+2){
        background: #0ab1fc;
    }
/* 选择第倒数第3个元素 */
li:nth-last-child(3){
background-color: #55007f;
}/* 选择倒数第三个以及之前的元素*/
li:nth-last-child(n+3) {
background-color: saddlebrown;
}/* 选择第一个元素和之后每+1个元素状态,1,3,5...*/
li:nth-child(2n+1){
background: red;
}方法还有很多,可以看以上案例,通过举一反三去实现自己需要的效果,重要的是思想,看到一个效果不要着急上手,先思考如何去实现,以及实现的细节,其次才是上手。
定位+隐藏+hover 前端
效果图

CSS
ul {
                list-style: none;
            }

            .linda{
                margin-top: 50px;
                height: 400px;
            }
            .linda li {
                padding: 13px;
                float: left;
            }
            /* 第一个li */
            .linda li:nth-child(1) {
                padding-left: 0;
            }
            /* 最后一个li */
            .linda li:last-child {
                padding-right: 0;
            }

            .linda .img {
                /* 超出隐藏 */
                overflow: hidden;
                /* 绝地定位 */
                position: relative;
                width: 280px;
              }
            /* 给图片设置动画效果 */
            .lid-img {
                transition: all 0.5s;/* 动画 */
                left: 0;
                bottom: 0;
                position: absolute;/* 定位 */
                text-align: center;
                width: 100%;
                height: 0px;/* 初始值0让一开始隐藏 */
                background-color: rgb(23 21 21 / 48%);
            }

            .linda .img:hover .lid-img {
                /* 鼠标移入显示图片盒子,给盒子设置高度 */
                height: 80px;
            }
             /* 给span设置样式 */
            .lid-img span {
              vertical-align:middle;
              display: inline-block;
              margin: 15px 5px;
              width: 50px;
              height: 50px;
              border: solid 1px #fff;
              background: url(images/img-sprite.png) no-repeat;

            }
             /* 这里是第二个span,不用设置别的属性了,因为第一个已经设置了 */
            .lid-img span:nth-child(2) {
                background-position: -42px 0;
            }
             /* 第三个span */
            .lid-img span:nth-child(3) {
                background-position: -85px 0px;
            }

            .linda img {
                /* 以盒子高度为参考,给图片高度100%,但是图片没有对齐盒子底部 */
                vertical-align: bottom;/* 此代码也可以解决底部三像素,底部对齐 */
                width: 100%;
                height: 100%;
            }
HTML
<div class="linda banx ">
            <ul>
                <li>
                    <div class="img">
                        <img src="images/t1.jpg" alt="">
                        <div class="lid-img">
                            <span></span>
                            <span></span>
                            <span></span>
                        </div>
                    </div>
                </li>

                <li>
                    <div class="img">
                        <img src="images/t1.jpg" alt="">
                        <div class="lid-img">
                            <span></span>
                            <span></span>
                            <span></span>
                        </div>
                    </div>
                </li>

                <li>
                    <div class="img">
                        <img src="images/t1.jpg" alt="">
                        <div class="lid-img">
                            <span></span>
                            <span></span>
                            <span></span>
                        </div>
                    </div>
                </li>

                <li>
                    <div class="img">
                        <img src="images/t1.jpg" alt="">
                        <div class="lid-img">
                            <span></span>
                            <span></span>
                            <span></span>
                        </div>
                    </div>
                </li>
            </ul>
</div>解决li转成行内块产生的空格间隙 前端

使用无序列表做菜单的时候,把li转成行内块,发现li之间有空格间隙,解决办是给ui字体大小设置为0,给li重新定义字体大小。
代码如下:
CSS
            ul {
                background-color: black;
                width: 100%;
                background-color: saddlebrown;
                text-align: center;
                font-size: 0;
            }

            li {
                background-color: white;
                display: inline-block;
                font-size: 16px;
            }
HTML
<ul>
    <li>菜单1</li>
    <li>主页</li>
    <li>日记</li>
    <li>照片</li>
</ul>input type="属性值" 前端
input type="button" 普通按钮

input type="checkbox" 复选框

input type="color" 颜色选择器

input type="date" 日期,包括年,月和日

input type="datetime-local" 日期时间,包括年,月,日,小时和分钟

input type="email" 邮箱

input type="file" 上传文件

input type="hidden" 不显示,隐藏元素

input type="image" 图片按钮

input type="month" 年月

input type="number" 数值

input type="password" 密码

input type="radio" 单选框

input type="range" 滑块

input type="reset" 重置

input type="search" 搜索

input type="submit" 提交

input type="tel" 电话

input type="text" 文本

input type="time" 时间

input type="url" 网址

input type="week" 周日用CSS 前端
CSS超出隐藏
overflow: hidden;解决底部三像素
vertical-align:baseline | sub | super | top | text-top | middle | bottom | text-bottom |inherit
清除浮动
类名::after{
            content: "";
            display: block;
            clear: both;
}蒙层+动画【进阶版】 前端
效果图
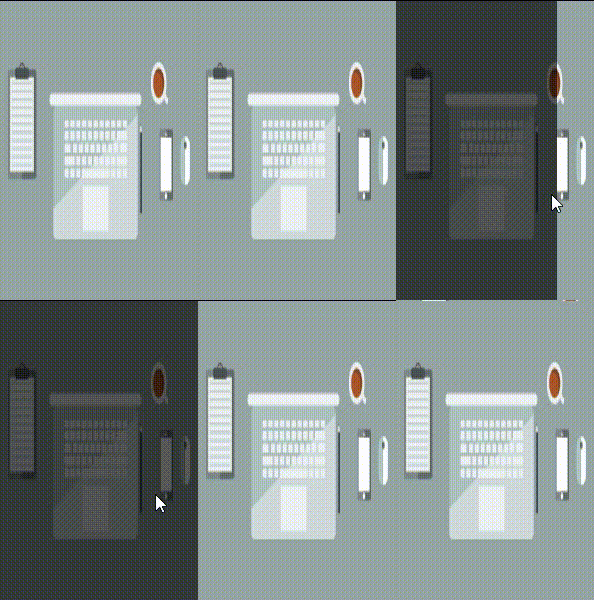
给li hover效果,让蒙层初始值宽度为0,当鼠标移入到li时,蒙层宽度增加,在添加一个动画效果即可实现。
代码如下
CSS
    li {
                width: 200px;
                height: 300px;
                position: relative;
                background-color: saddlebrown;
            }

            img {
                width: 200px;
                height: 100%;
            }

            .Mask {
                width: 0;
                /* 初始值 */
                height: 300px;
                background-color: rgb(0 0 0 / 65%);
                position: absolute;
                top: 0;
                left: 0;
            }

            li:hover .Mask {
                transition: all 1s;
                /* 动画 */
                width: 200px;
                /* 目标值 */
            }
HTML
<ul>
            <li>
                <img src="images/31.jpg" alt="">
                <div class="Mask">

                </div>
            </li>
</ul>CSS添加蒙层效果 前端
给元素添加蒙层效果
原图

效果图
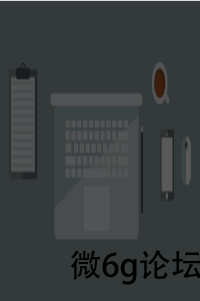
思路:
蒙层盒子在父元素下,给父元素设置相对定位,给蒙层(子元素)设置绝对定位,让蒙层和父元素重合,给蒙层设置透明度即可。
代码如下:
css
img {
                width: 200px;
                height: 300px;
            }

            li {
                position: relative;

            }

            .Mask {
                width: 200px;
                height: 300px;
                background-color: rgb(0 0 0 / 65%);
                position: absolute;
                top: 0;
                left: 0;
            }
HTML
<ul>
            <li>
                <img src="images/31.jpg" alt="">
                <div class="Mask">

                </div>
            </li>
       </ul>


